智能助手 
手写插件有许多好处,以下是一些详细的原因:
手写插件可以根据个人需求进行定制。市面上的插件功能可能不完全符合你的需求,而自己动手开发插件,可以精确地实现你想要的功能。
有时,你可能需要一个非常特定的功能,而现有的插件无法提供。手写插件可以帮助你快速解决这些特定问题,提高工作效率。
使用第三方插件时,安全性是一个重要的考虑因素。自己开发插件,可以确保代码的安全性,避免潜在的隐私泄露或恶意行为。
虽然许多插件是免费的,但一些高级功能需要付费。通过手写插件,你可以免费获得这些功能,同时避免不必要的开支。
总之,手写插件不仅能带来技术上的成长,还能在日常生活中提供实际的便利和解决方案。
一个 Chrome 插件通常包含以下文件和目录:
my-qrcode-plugin/
│
├── manifest.json  // 插件的配置文件,定义插件的基本信息、权限和功能。
├── background.js  // 后台脚本,负责处理插件的逻辑,例如创建右键菜单。
├── popup.html     // 插件的弹出页面,用户点击插件图标时显示。
├── popup.js       // 插件的弹出页面,执行的脚本。
└── icons/         // 存放插件的图标,建议提供 16x16、48x48 和 128x128 像素的图标,不同大小的图标有不同的作用。
    ├── icon16.png
    ├── icon48.png
└── icon128.pngmanifest.json 是插件的核心配置文件:
{
  "manifest_version": 3,
  "name": "QR Code Generator",
  "version": "1.0",
  "permissions": ["contextMenus", "activeTab", "scripting"],
  "icons": {
    "16": "icons/icon16.png",
    "48": "icons/icon48.png",
    "128": "icons/icon128.png"
  },
  "background": {
    "service_worker": "background.js"
  },
  "action": {
    "default_popup": "popup.html"
  }
}background.js 负责插件后台的逻辑实现:
chrome.runtime.onInstalled.addListener(() => {
  chrome.contextMenus.create({
    id: "generateQRCode",
    title: "Generate QR Code",
    contexts: ["page"]
  });
});

chrome.contextMenus.onClicked.addListener((info, tab) => {
  if (info.menuItemId === "generateQRCode") {
    const url = tab.url;
    const apiUrl = `https://api.cl2wm.cn/api/qrcode/code?text=${url}&mhid=sELPDFnok80gPHovKdI`;

    chrome.scripting.executeScript({
      target: { tabId: tab.id },
      func: showQRCode,
      args: [apiUrl]
    });
  }
});

function showQRCode(apiUrl) {
  const iframe = document.createElement('iframe');
  iframe.style.position = 'fixed';
  iframe.style.top = '50%';
  iframe.style.left = '50%';
  iframe.style.transform = 'translate(-50%, -50%)';
  iframe.style.width = '500px';
  iframe.style.height = '500px';
  iframe.style.border = 'none';
  iframe.style.zIndex = '1000'; // 确保在最上层
  iframe.src = apiUrl;

  document.body.appendChild(iframe);

  setTimeout(() => {
    iframe.remove();
  }, 5000);
}popup.html 是插件的用户界面:
<!DOCTYPE html>
<html lang="en">
<head>
  <meta charset="UTF-8">
  <meta name="viewport" content="width=device-width, initial-scale=1.0">
  <title>QR Code Generator</title>
  <style>
    body {
      width: 500px;
      height: 500px;
      display: flex;
      justify-content: center;
      align-items: center;
      font-family: Arial, sans-serif;
    }

    #qrcode iframe {
      width: 500px;
      height: 500px;
      border: none;
    }
  </style>
</head>
<body>
  <div id="qrcode">
    <iframe id="qrFrame" src=""></iframe>
  </div>
  <script src="popup.js"></script>
</body>
</html>popup.js 是插件的用户界面的执行脚本:
document.addEventListener('DOMContentLoaded', function() {
  chrome.tabs.query({active: true, currentWindow: true}, function(tabs) {
    if (tabs.length === 0) {
      console.error('No active tab found');
      return;
    }

    const url = tabs[0].url;
    const apiUrl = `https://api.cl2wm.cn/api/qrcode/code?text=${url}&mhid=sELPDFnok80gPHovKdI`;

    const iframe = document.getElementById('qrFrame');
    iframe.src = apiUrl;
  });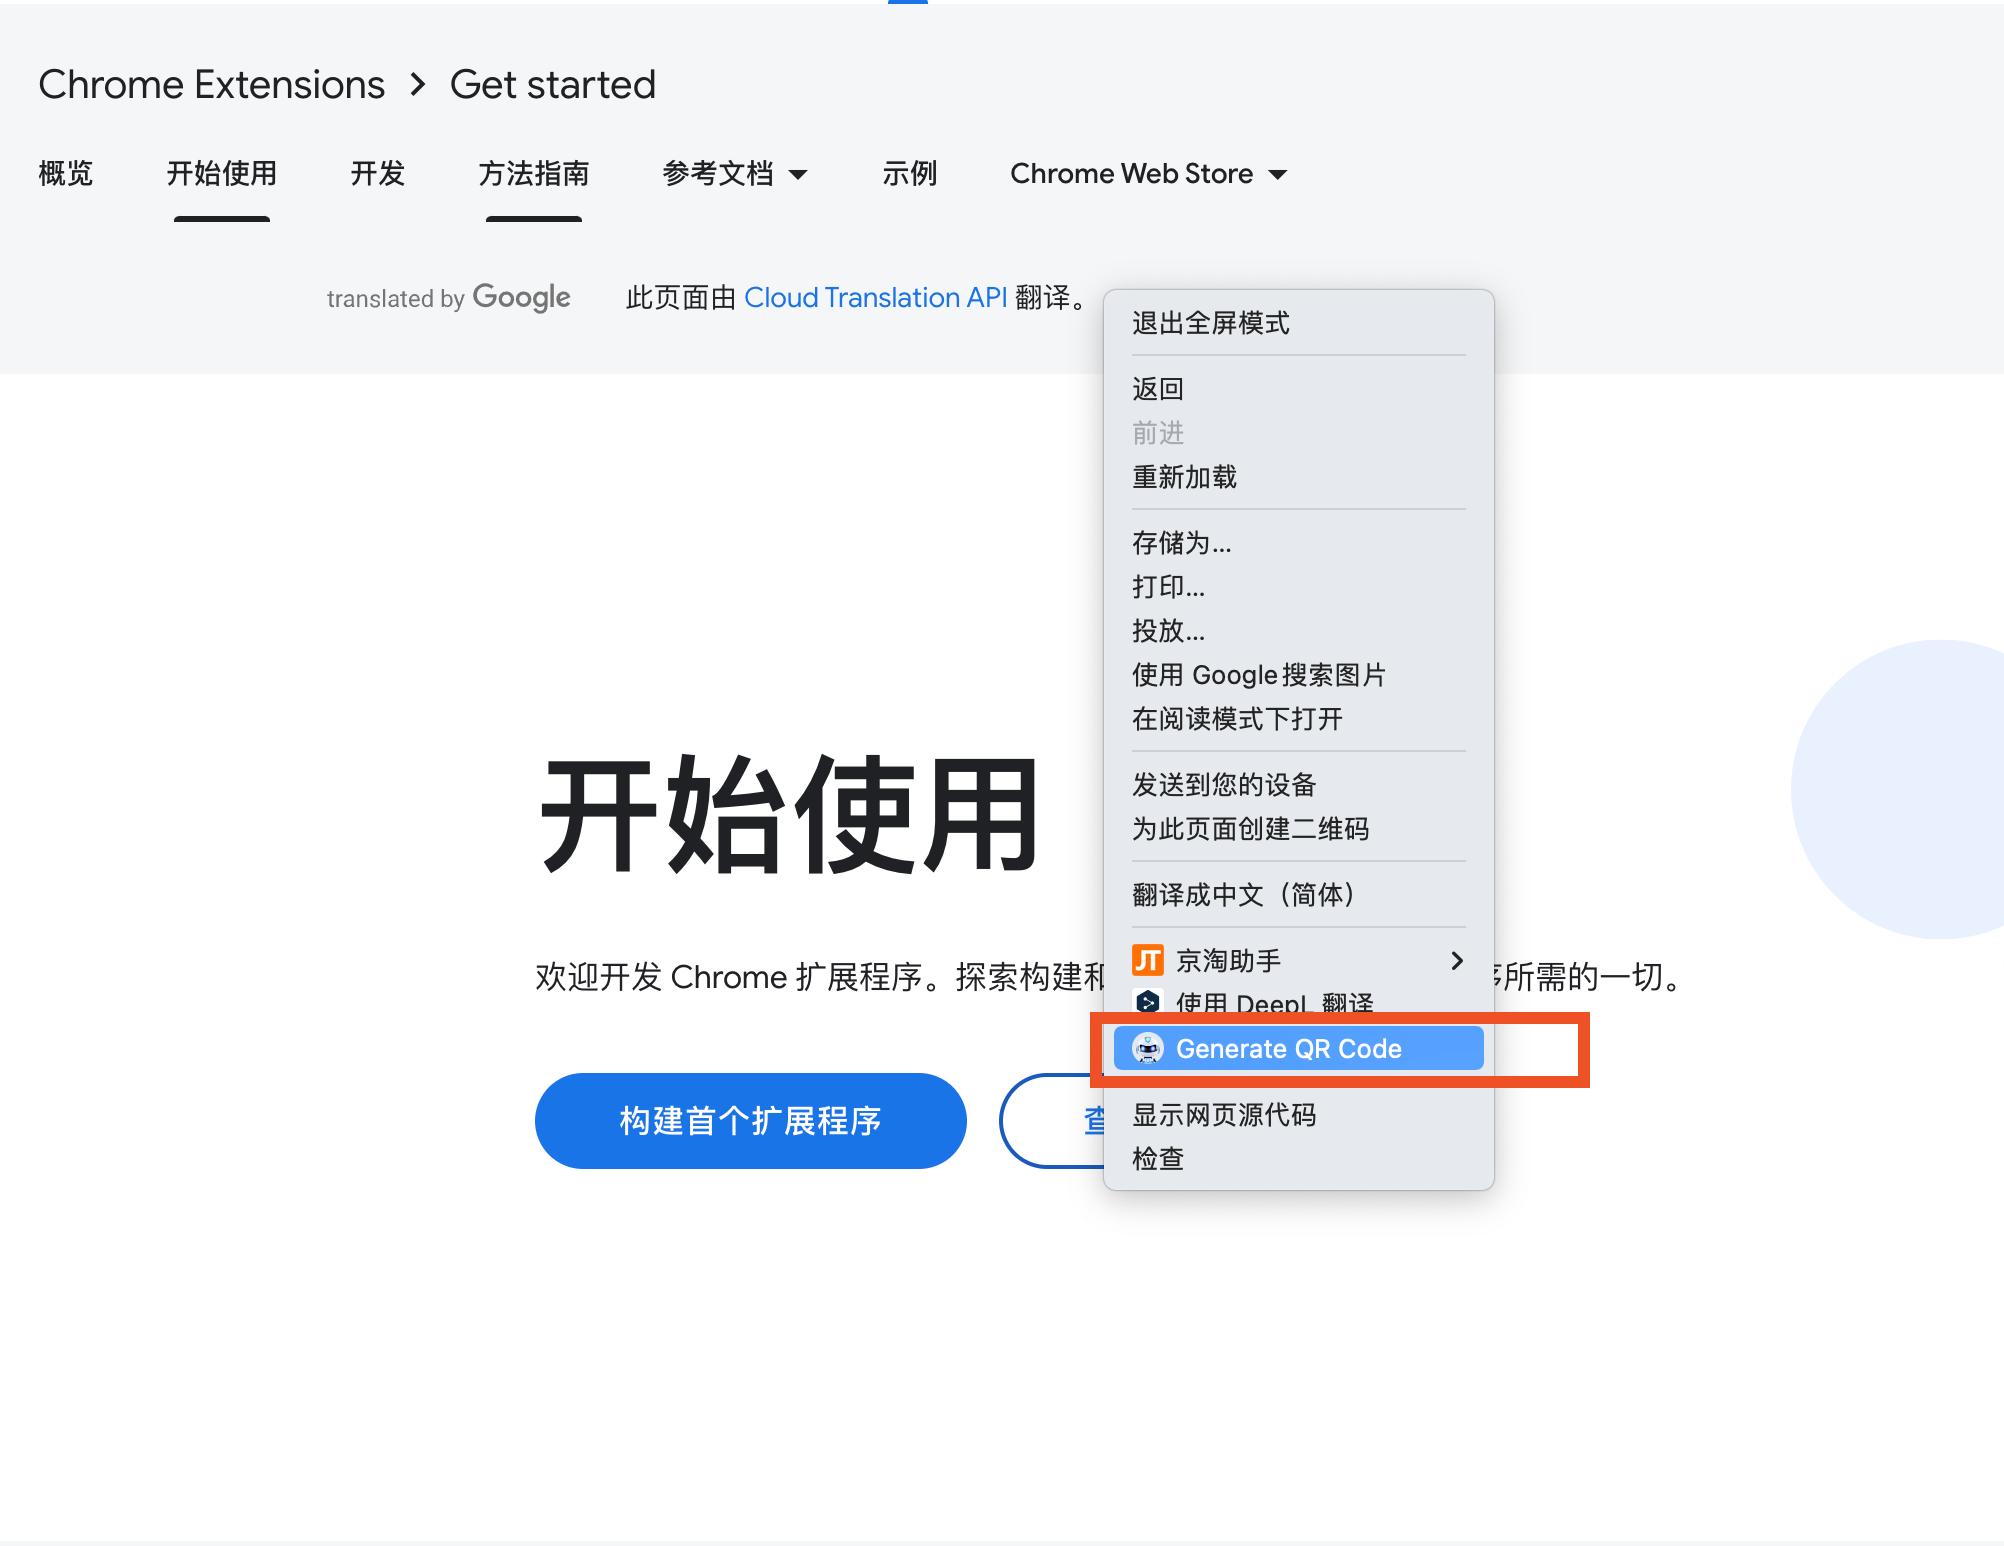
});在浏览器上测试 Chrome 插件功能,可以通过以下步骤进行:
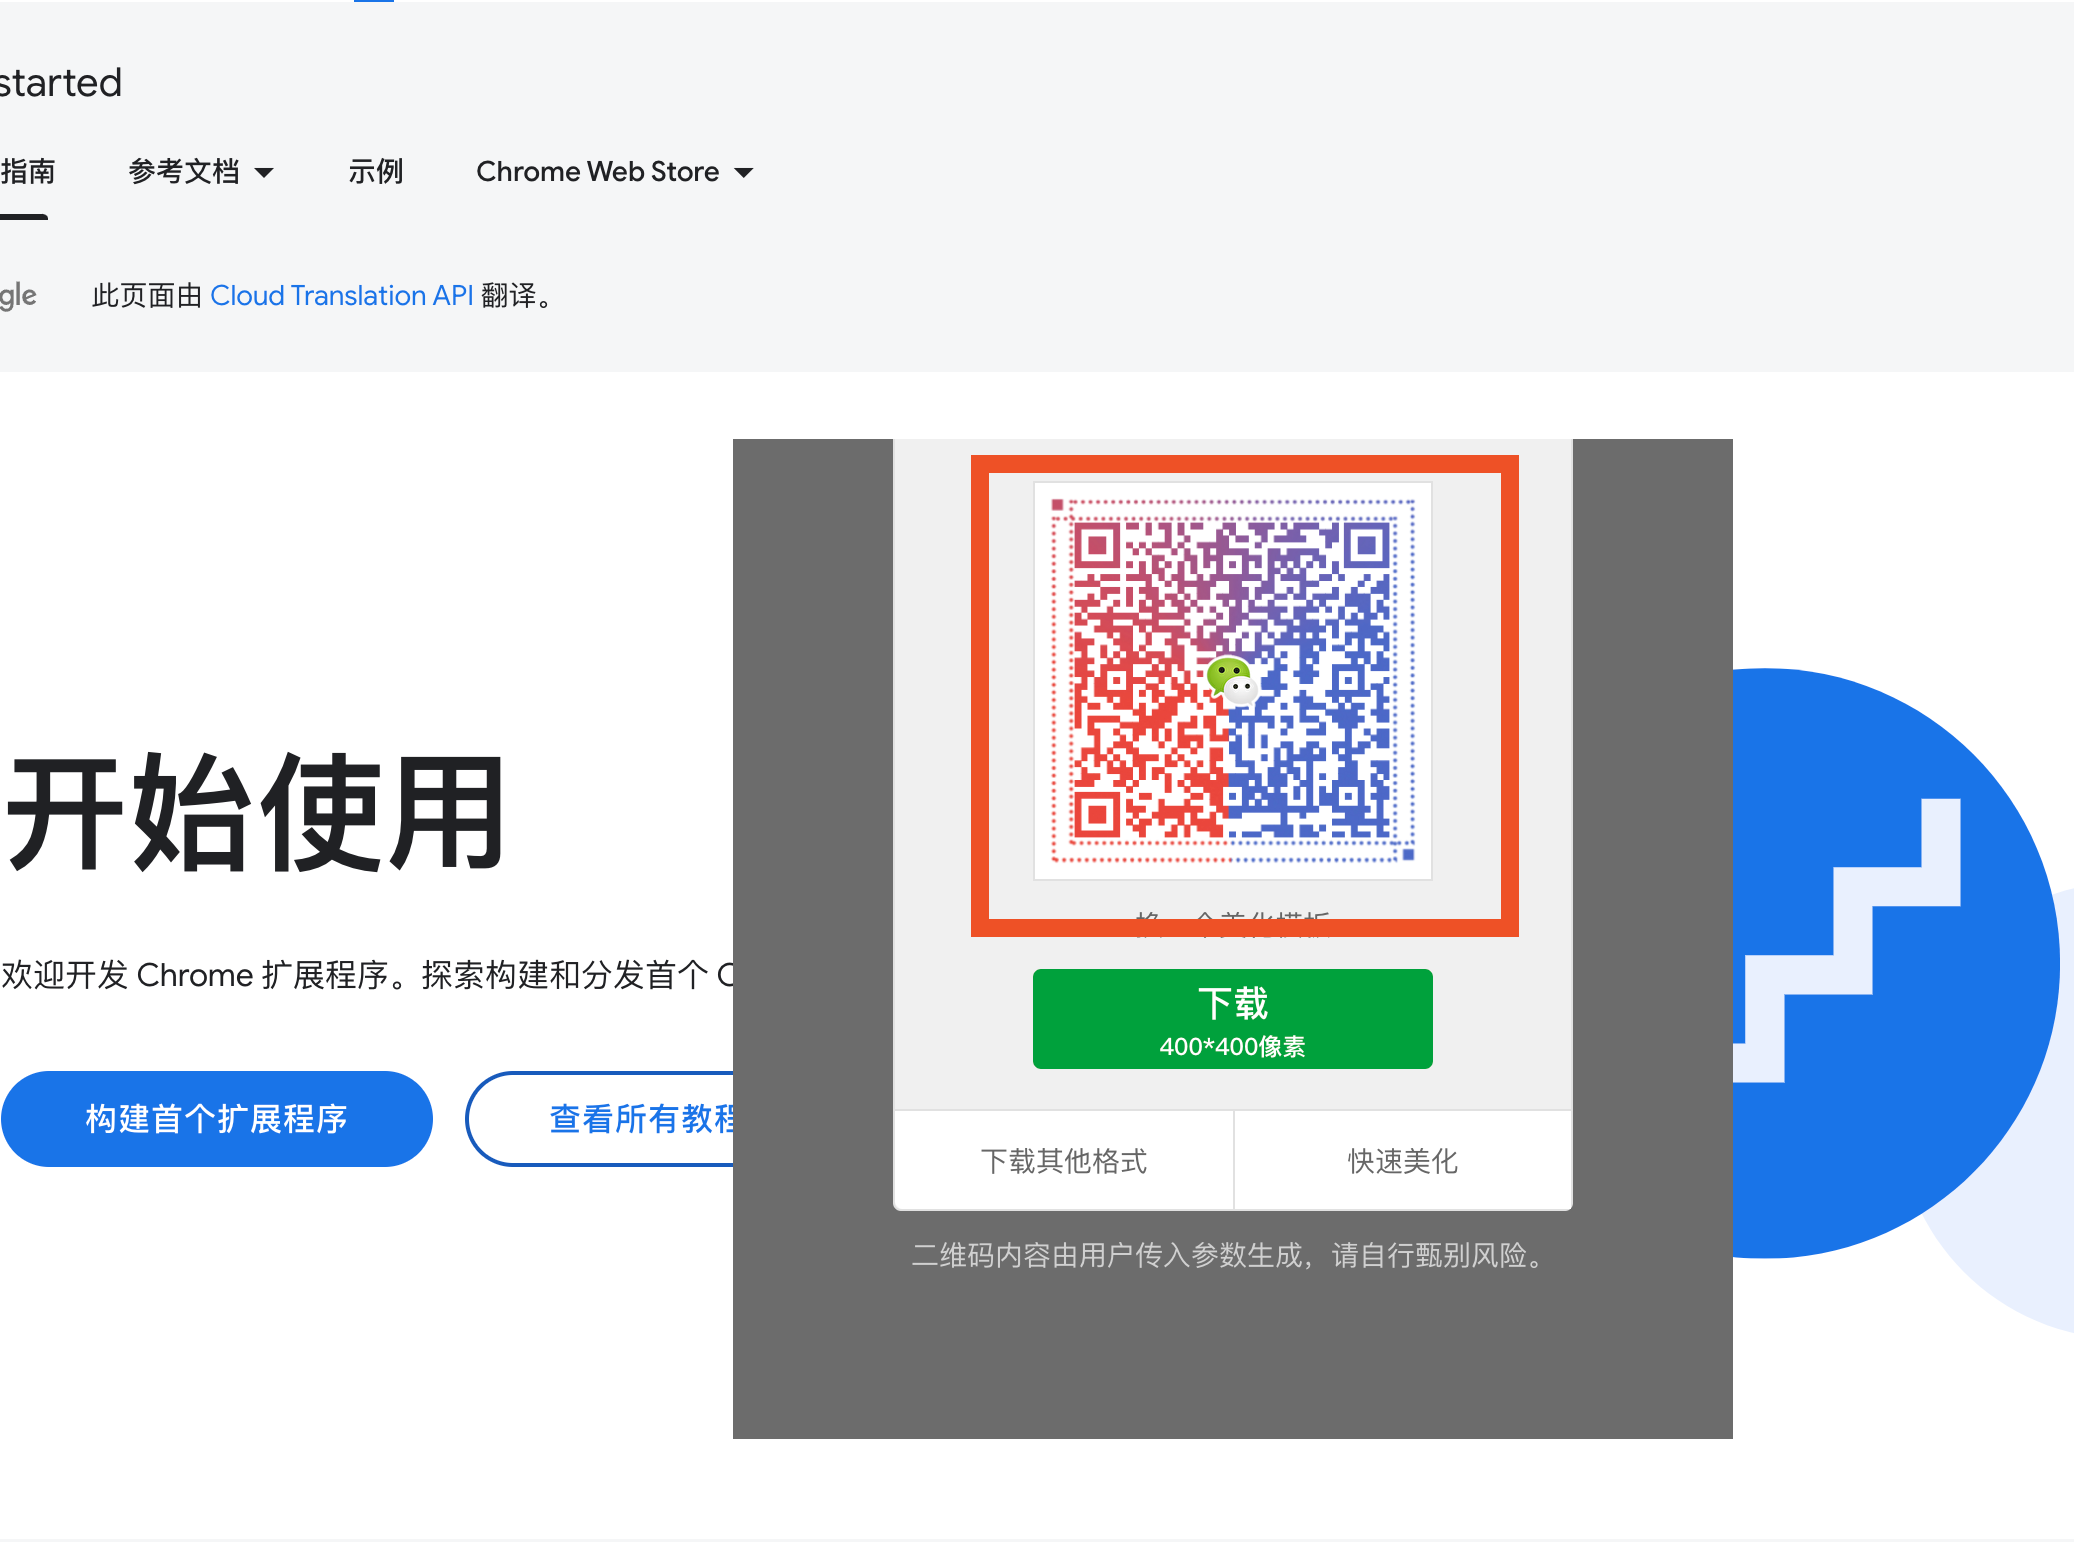
chrome://extensions/ 进入扩展管理页面。my-qrcode-plugin)。Generate QR Code,点击该菜单,页面生成一个二维码,手机扫描二维码即是该网页,5 秒后二维码消失视为验证通过。右键菜单截图:
二维码生成效果图
右上角插件入口截图: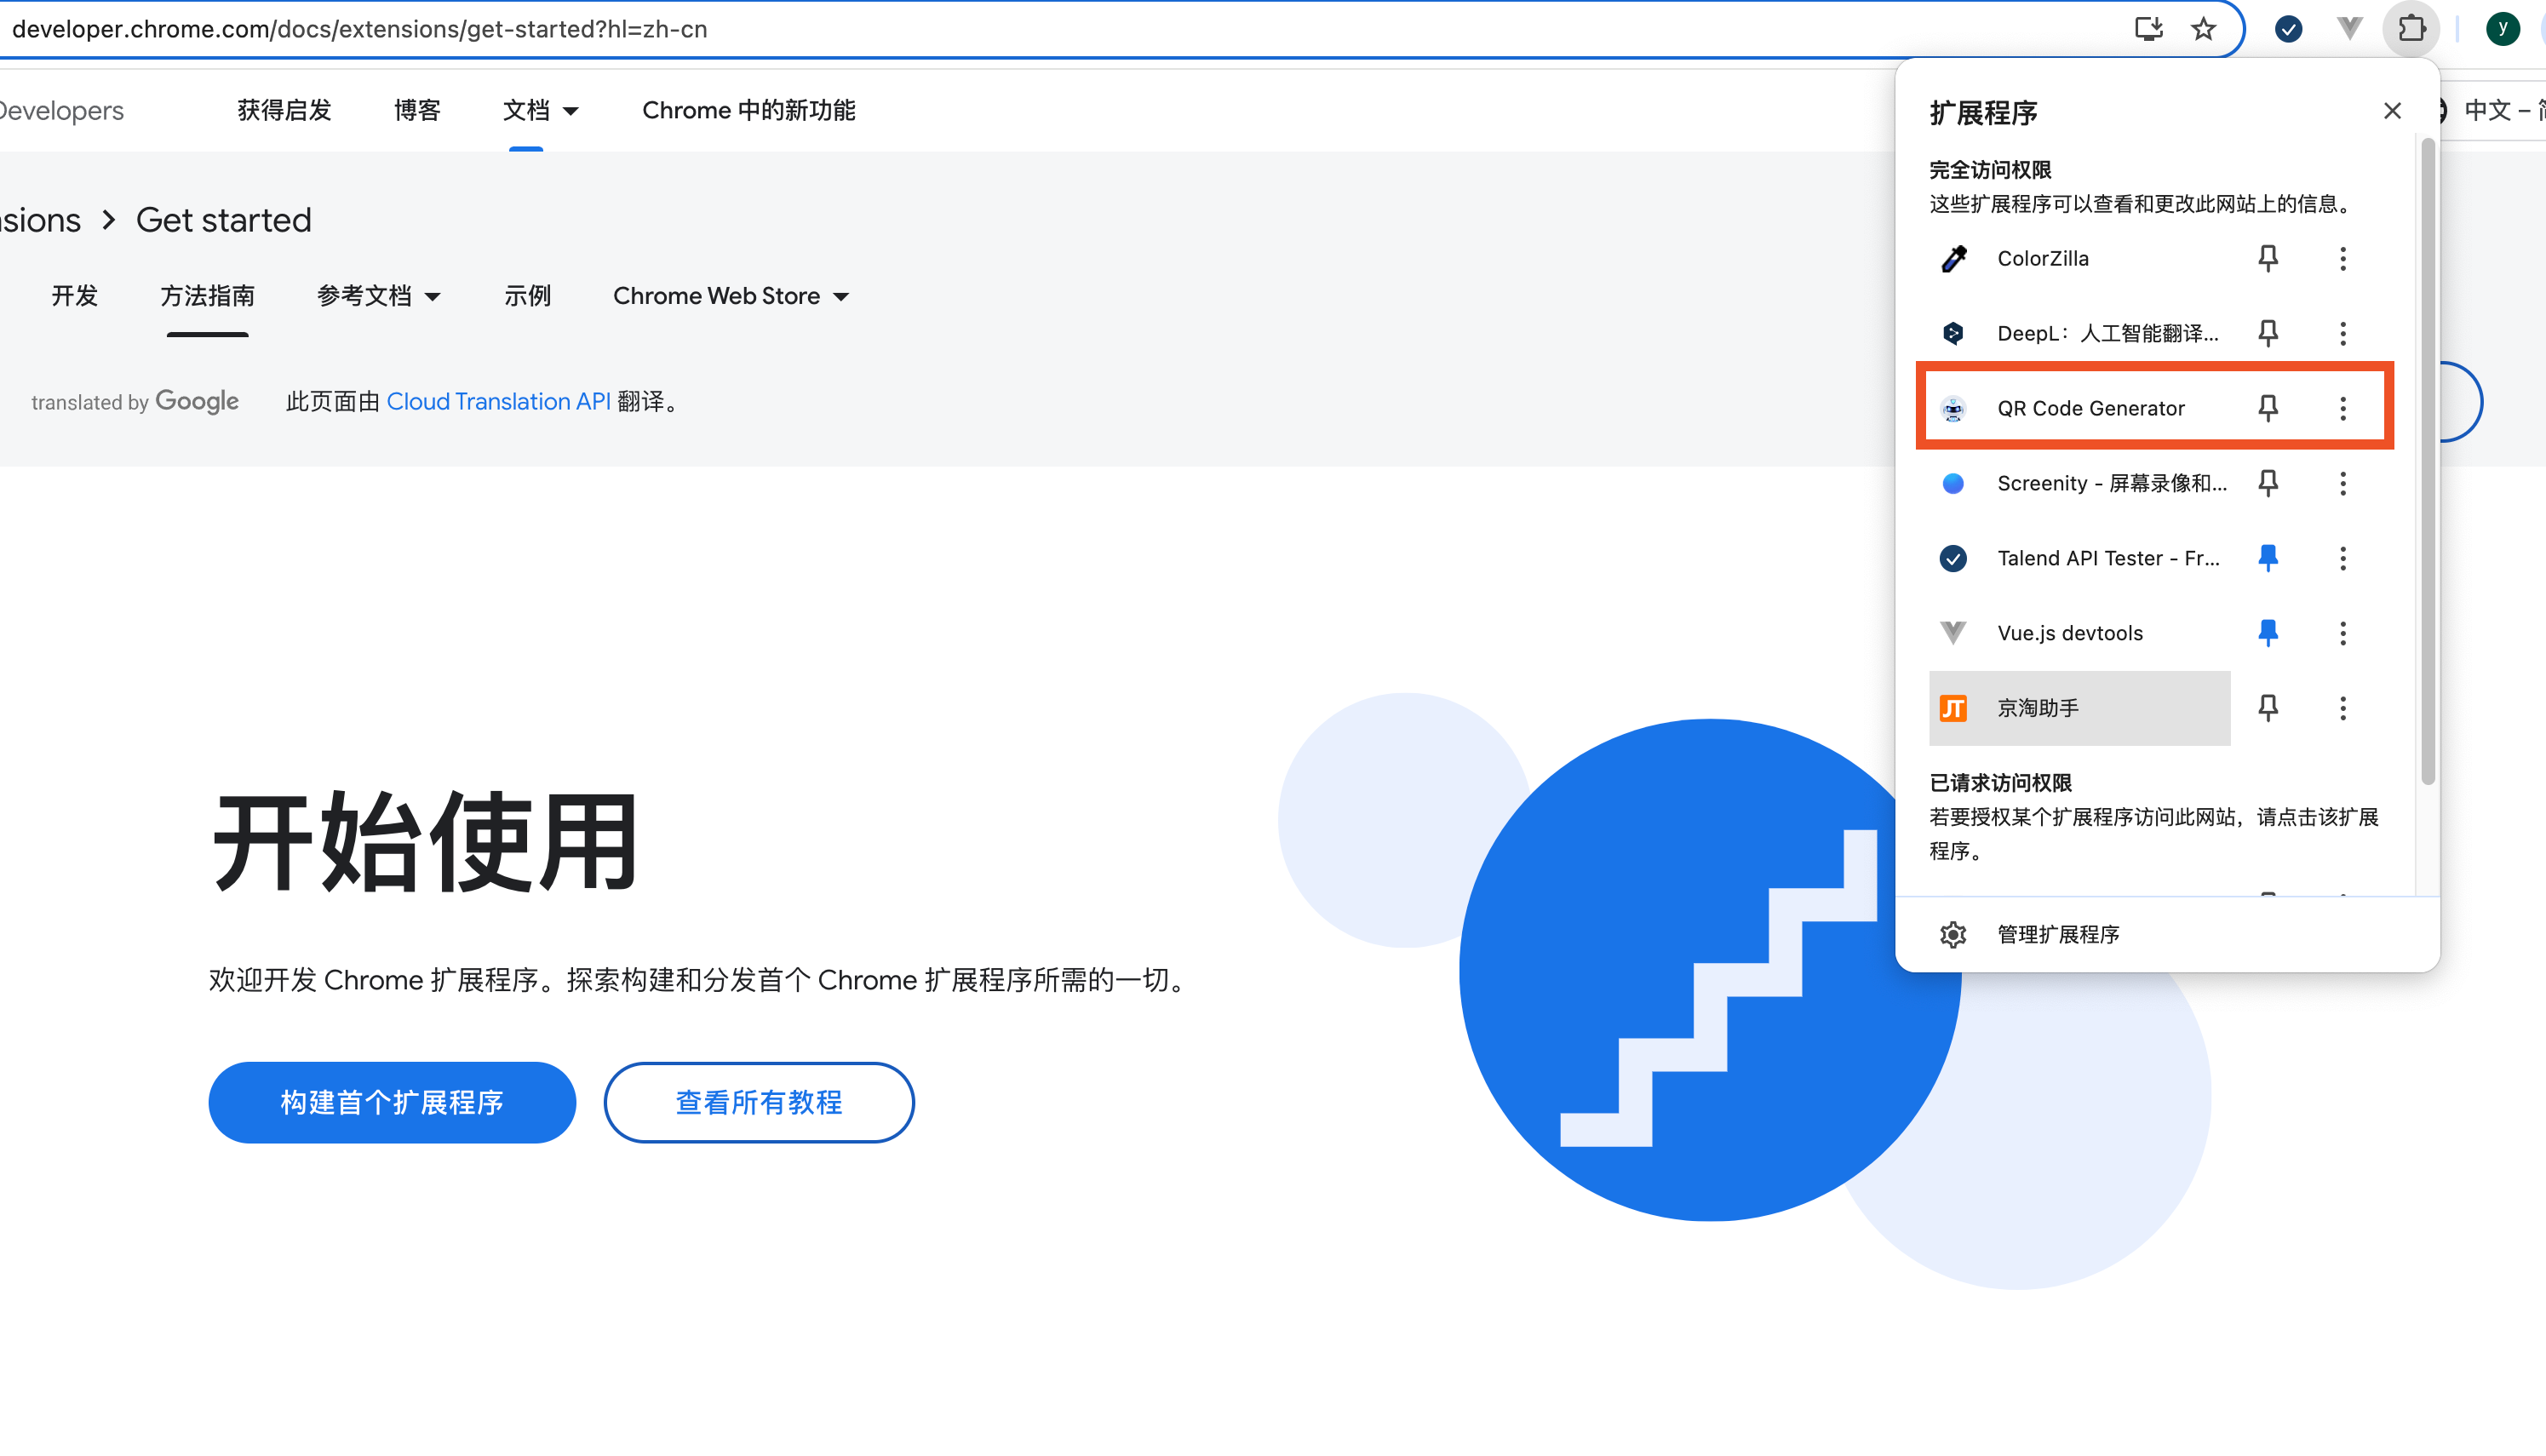
二维码效果图: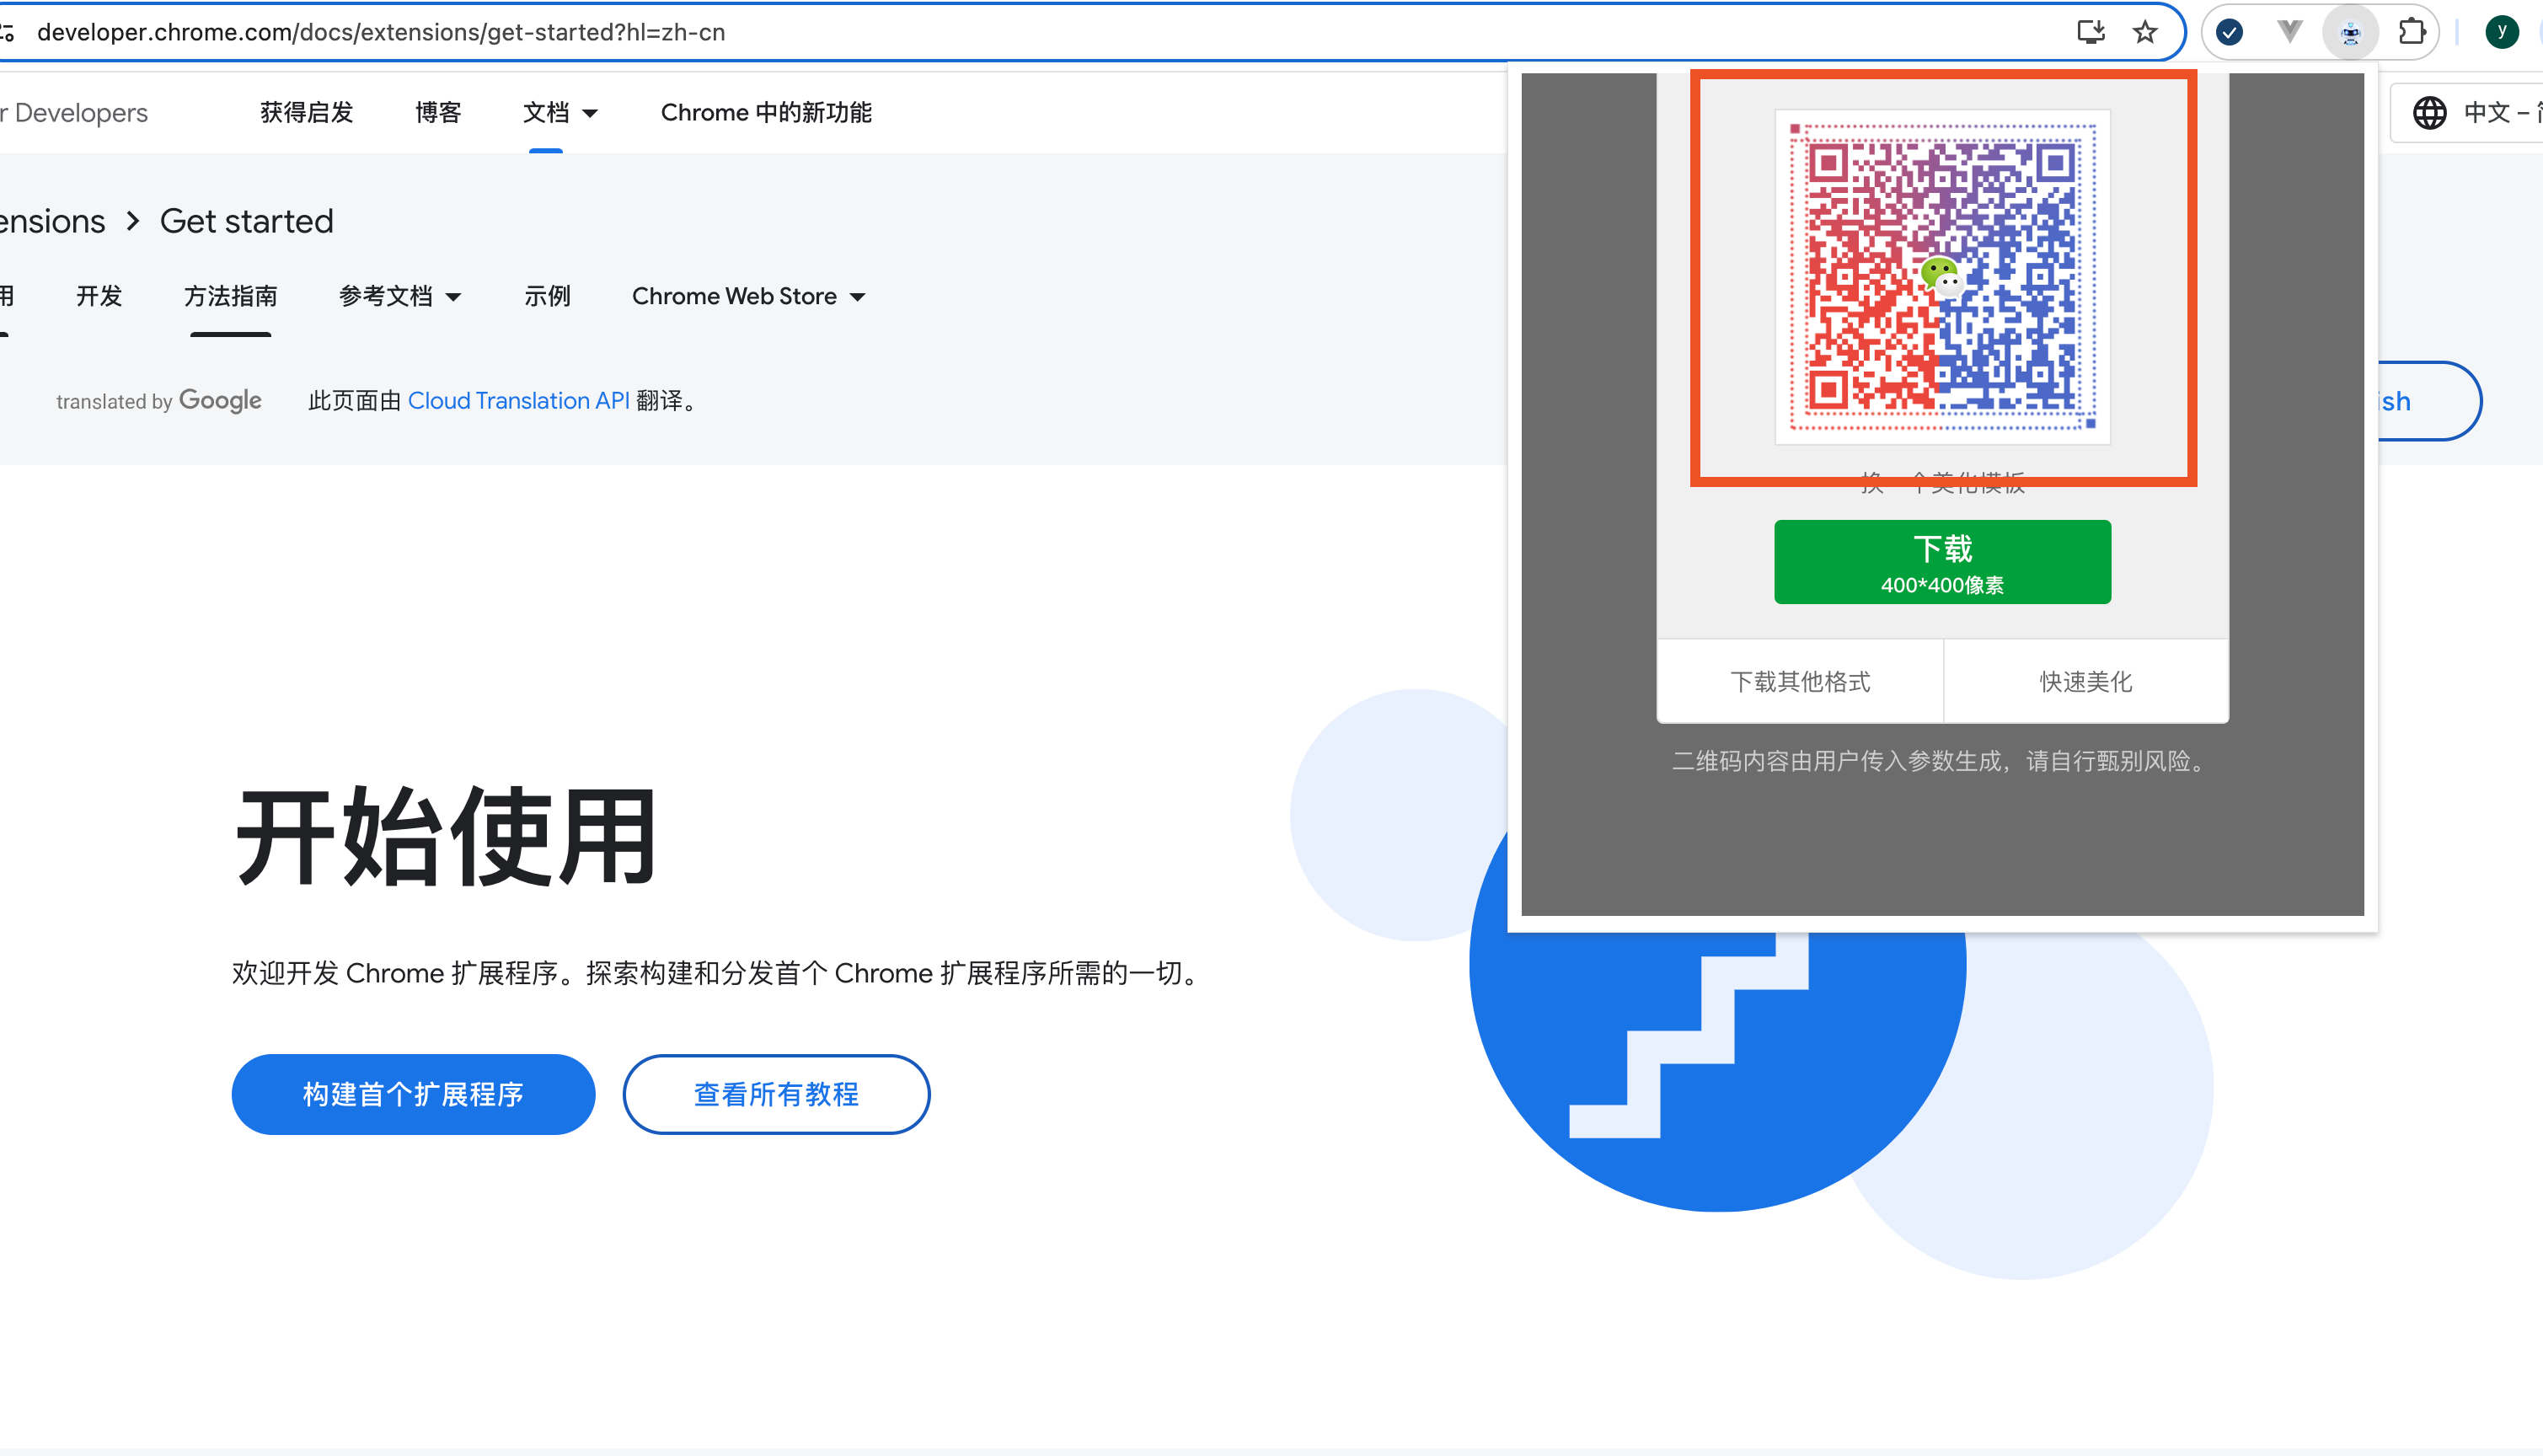
通过这些步骤,你可以在浏览器中高效地测试和调试 Chrome 插件的功能。
以下是发布谷歌插件的步骤:
.zip 文件。由于博主囊中羞涩,就没有支付费用,各位感兴趣的小伙伴可以通过以上步骤尝试去发布自己的插件,让更多的人看到。
通过实现一个简单的浏览器插件,帮助我们认识、掌握、应用浏览器插件的基本原理。更深入的知识咱们可以通过官网去学习。
版权归属: